Making barista-style coffee at home is so much more than just pressing a button. It's about grinding fresh beans, tamping them just right into a portafilter, pulling a beautiful, concentrated espresso shot, and steaming milk until it's perfectly silky. The real magic lies in the precision and technique you bring to each step to create those cafe-quality flat whites and lattes you love.
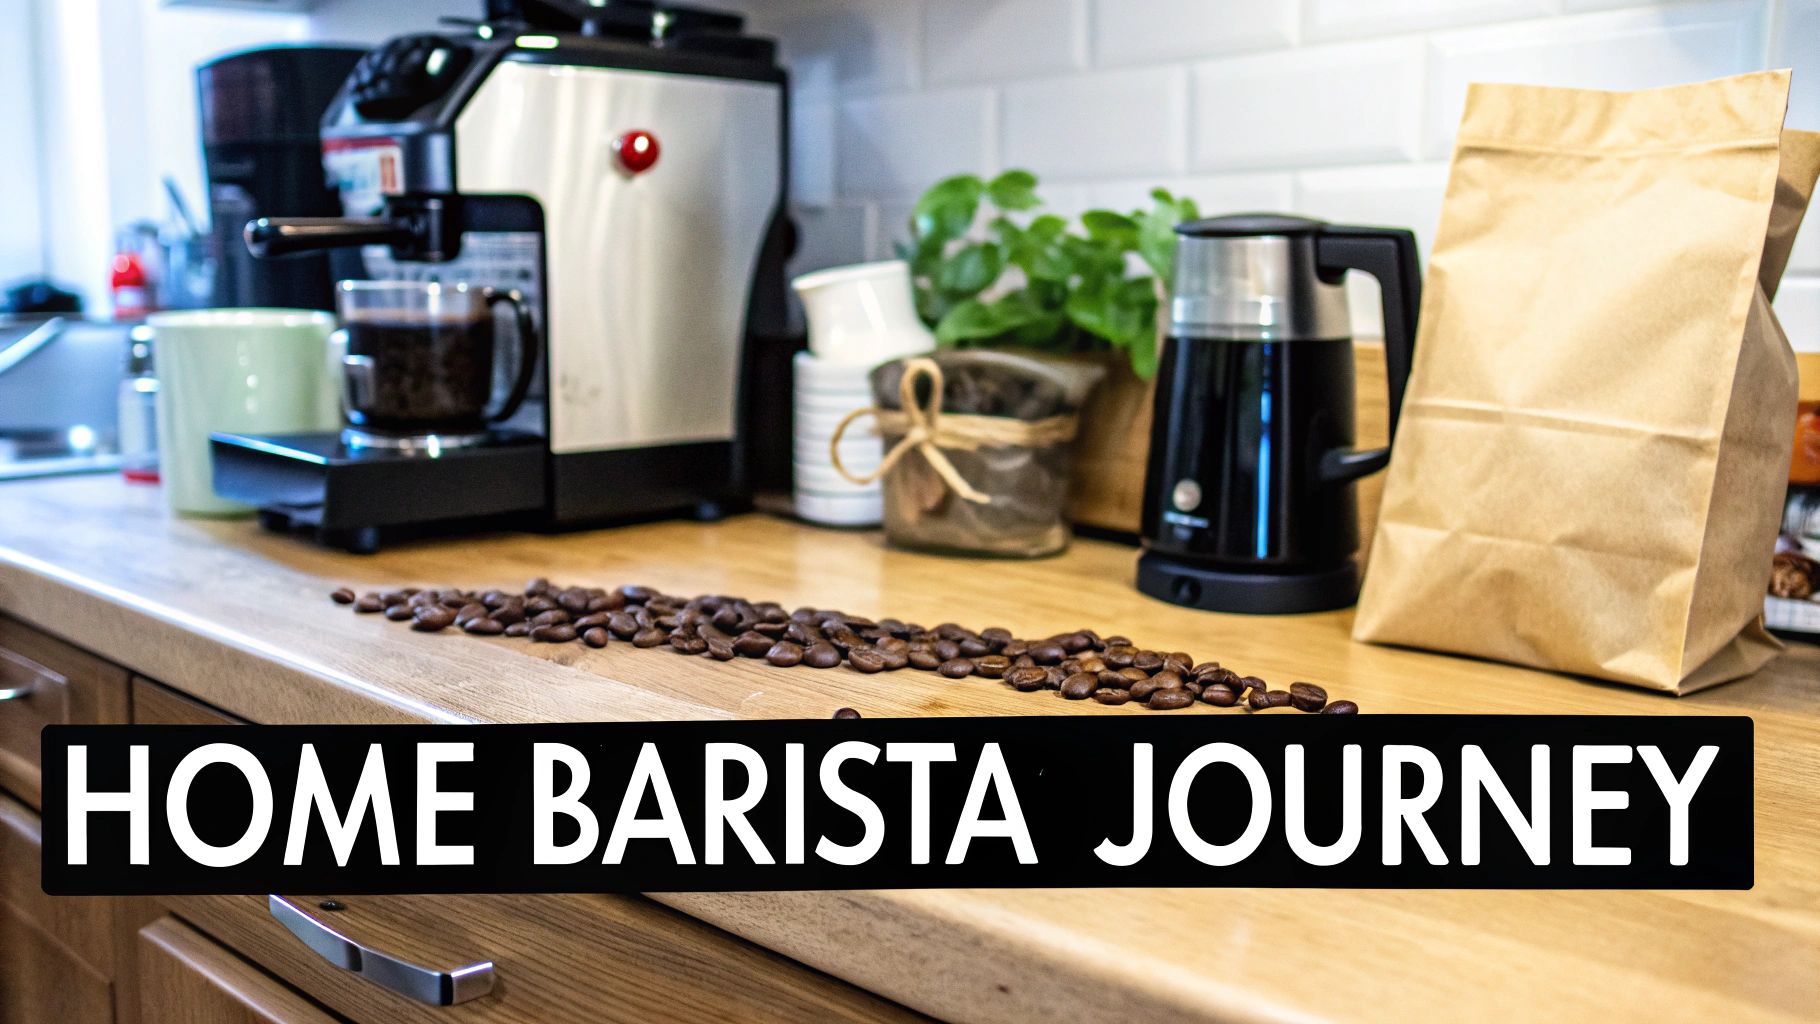
Your Journey to Becoming a Home Barista
Welcome to the wonderful world of home barista coffee! This isn't just about getting your morning caffeine fix; it’s about crafting an experience and turning your own kitchen into your favourite local cafe.
Learning this skill is incredibly rewarding. It puts you in complete control of the flavour, strength, and texture of your daily brew. Think of it as a journey—one that starts with understanding the basics and ends with you pouring a perfect flat white on a quiet Sunday morning.
The love for great coffee runs deep in Australian culture. Many of us feel like we can't get through the day without it, so it’s no surprise that Aussies consume around 1.91 kilograms of coffee per person each year. This passion is what drives the high standards you see in cafes everywhere, and now you can bring that same quality home. You can learn more about Australia's coffee habits and see how your own passion stacks up.
What to Expect on Your Path to Coffee Mastery
This guide will walk you through the entire process, breaking it all down into simple, manageable steps. You don't need a massive, commercial-grade setup to get started. We're going to focus on the essential gear and skills that truly make the biggest difference in your cup.
To give you a clearer picture, here’s a quick rundown of the core components we'll cover.
Home Barista Essentials at a Glance
| Component | What It Is | Why It Matters |
|---|---|---|
| Essential Gear | The non-negotiable tools like a quality grinder, espresso machine, and key accessories. | The right equipment is your foundation. A good grinder and machine give you the control needed for consistently great coffee. |
| The Perfect Shot | The art of "dialling in" your grind, tamping correctly, and pulling a rich, balanced espresso. | This is the heart of your drink. A perfect shot is sweet, aromatic, and complex—not bitter or sour. |
| Silky Smooth Milk | The technique for steaming milk to create a velvety microfoam for lattes and cappuccinos. | Properly textured milk combines perfectly with espresso, creating a smooth, delicious beverage and enabling latte art. |
This table lays out the roadmap for your learning journey.
We’ll demystify everything from dialling in your grinder to creating that velvety microfoam for lattes.
Your goal isn't just to follow steps but to understand the "why" behind them. This knowledge is what empowers you to troubleshoot any issues and consistently create drinks that you genuinely love.
Assembling Your Home Barista Toolkit
To start making genuine barista-quality coffee at home, you need the right gear. Don't worry, this doesn't mean you need to build a commercial cafe in your kitchen. Your journey really begins with just two key pieces of equipment: a capable espresso machine and, just as importantly, a quality coffee grinder.
The espresso machine is the heart of your operation. Machines generally fall into three camps: manual, semi-automatic, and automatic. Manual machines give you total control but come with a pretty steep learning curve. On the flip side, automatic machines do almost everything for you but leave very little room to develop your own skills.
For most people diving into home coffee, the semi-automatic machine is the sweet spot. It handles the tricky stuff like water temperature and pressure, leaving you to control the grind, dose, and shot timing. It’s the perfect balance, giving you consistency while still letting you learn the craft.
Choosing Your Grinder and Machine
The other non-negotiable piece of kit is a burr grinder. Blade grinders just smash beans into uneven pieces, which leads to a really inconsistent extraction and a brew that’s a messy mix of sour and bitter flavours. A burr grinder, however, crushes beans between two revolving surfaces, creating the uniform particles you absolutely need for a balanced shot of espresso. Honestly, investing in a decent burr grinder will often make a bigger difference to your coffee's flavour than the machine itself.
When you're picking out a machine, think about your budget and how hands-on you want to be. A simple single-boiler machine is a fantastic starting point. If you want to speed up your workflow, a more advanced heat exchange or dual boiler machine lets you pull shots and steam milk at the same time.
This infographic breaks down the essential choices for setting up your station at home.
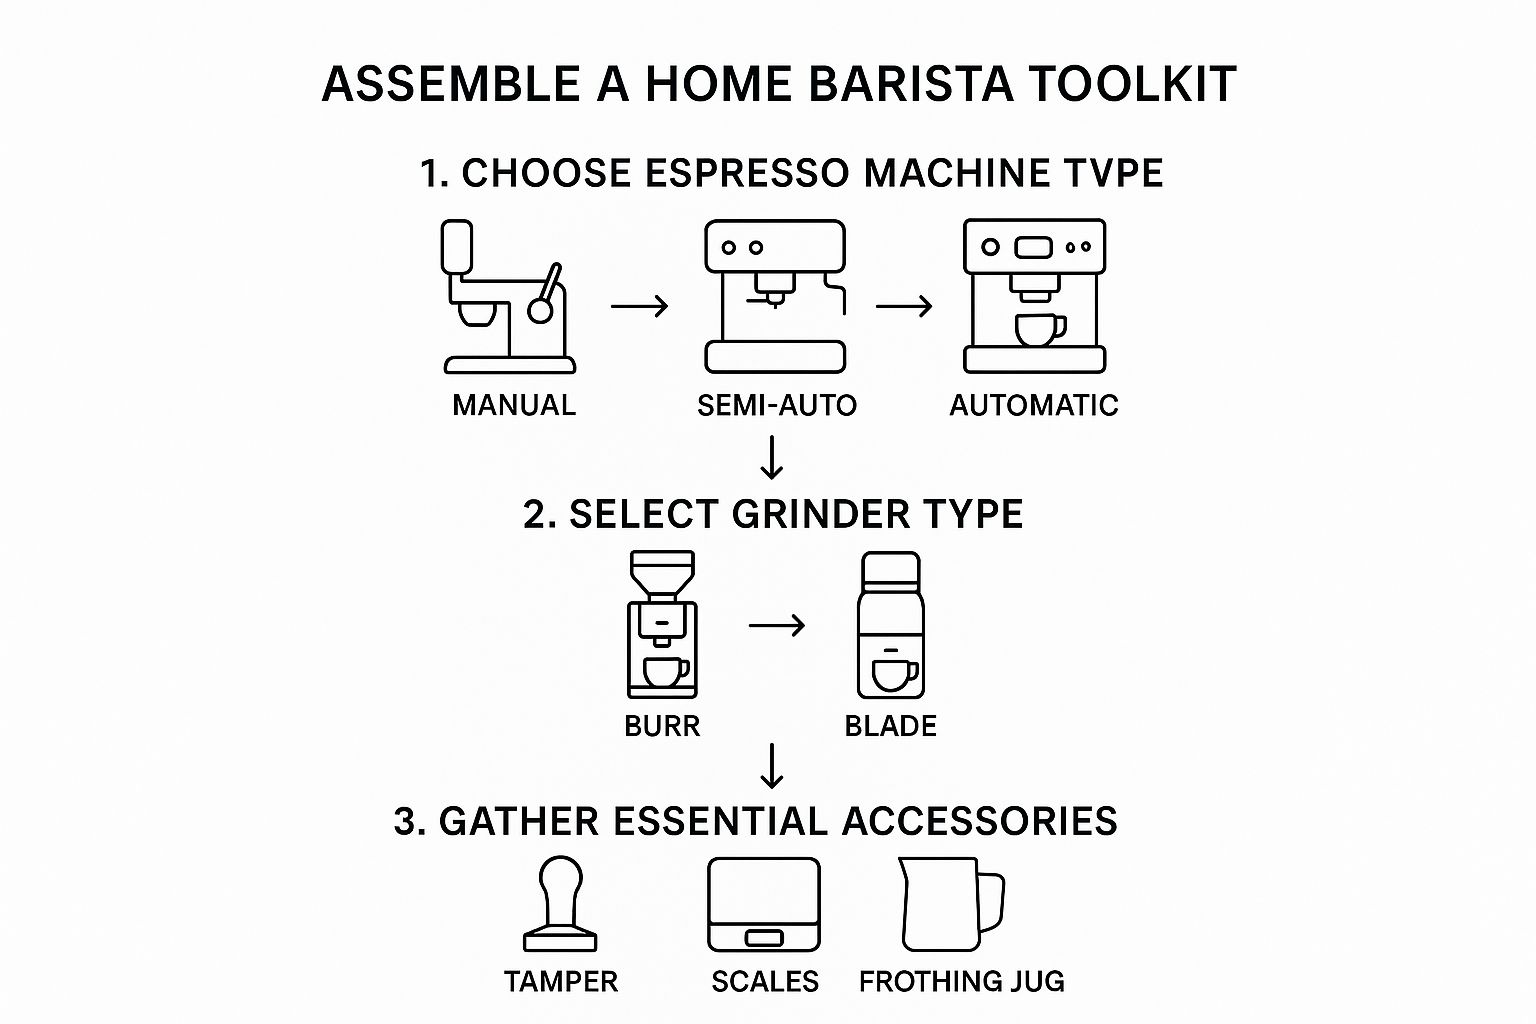
As you can see, there’s a logical flow to it: start with the machine, pair it with a great grinder, and then add the supporting accessories to round out your toolkit.
Must-Have Barista Accessories
Beyond the big-ticket items, a few smaller tools are vital for getting that precision and consistency you’re after.
- Digital Scales: Weighing your coffee dose and your final espresso shot is the only real way to get repeatable, reliable results.
- Tamper: A good, solid tamper that fits your portafilter snugly is crucial for creating a level and evenly compressed puck of coffee grounds.
- Milk Frothing Jug: You'll need a stainless steel jug with a good spout for steaming milk and, of course, for practising your latte art.
- Knock Box: This is just a simple bin that lets you cleanly and easily discard your used coffee pucks without making a mess.
Remember, consistency is everything when you're learning how to make barista coffee. These tools aren't just for show; they're fundamental for controlling all the variables so you can perfect your technique, one cup at a time.
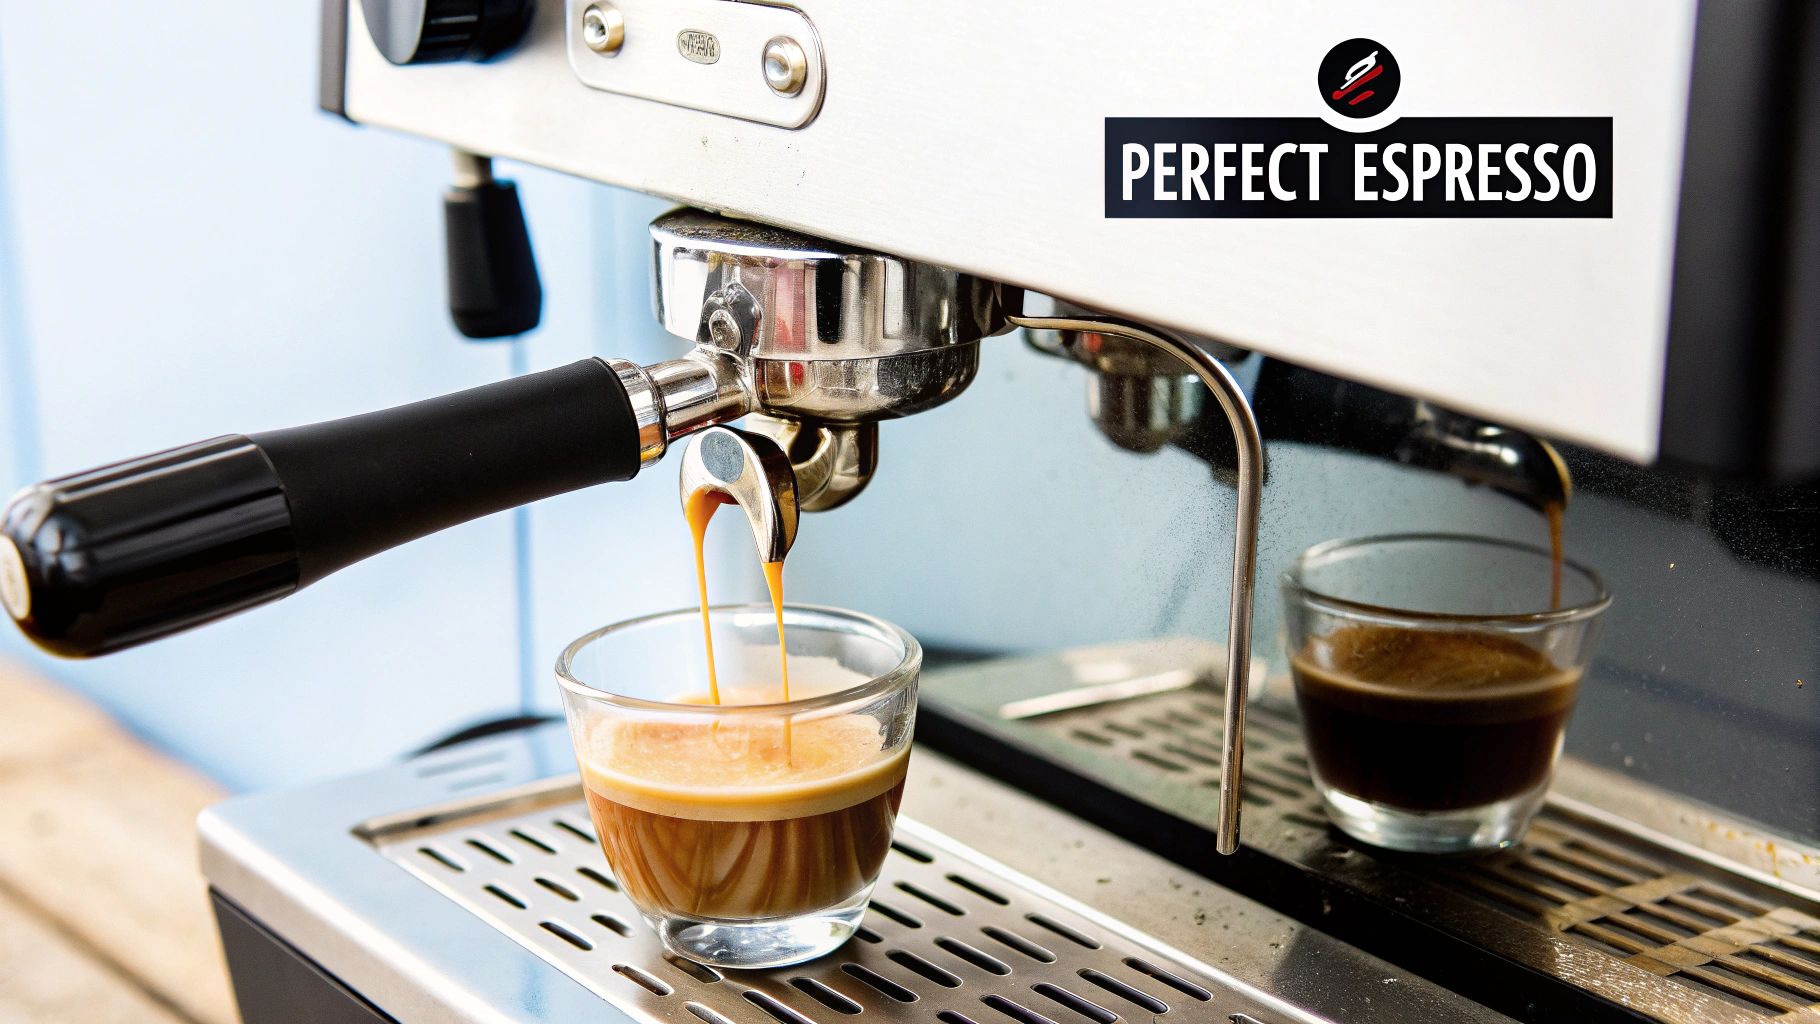
Mastering The Perfect Espresso Shot
The espresso shot is the heart and soul of your drink. Honestly, getting it right is one of the most satisfying parts of learning to be your own barista. This is where a little bit of precision goes a long way, turning great beans into a spectacular flavour base for any coffee you make. It all starts with your grinder—which, believe it or not, is probably more important than your espresso machine.
The very first job is to dial in your grinder. This just means tweaking the burrs to find the sweet spot for your specific beans. You're aiming for a consistency that feels like fine sand or table salt—not a chunky powder, but definitely not as fine as flour.
Grind, Dose, Tamp, Extract
This four-part ritual is what every barista lives by to pull a great shot of espresso. Getting consistent at each stage is what separates a truly fantastic coffee from a disappointing one. A tiny change in just one of these steps can completely alter the taste in your cup.
The trick is to only ever change one thing at a time when you're trying to fix a bad shot. If your coffee isn't tasting right, adjust your grind size first before you start playing around with anything else. This systematic approach makes it so much easier to figure out what's going wrong.
A set of digital scales is your best friend here. Weighing your dose of ground coffee means you're using the exact same amount every single time, which is usually between 18-20 grams for a standard double shot. This takes all the guesswork out and helps you build a repeatable, reliable process.
Once the coffee is in your portafilter, you need to get the grounds sitting nice and even. A few gentle taps on the side of the portafilter can do the trick, or you can get a specialised distribution tool if you want to get serious.
The whole point of distributing and tamping is to create a solid, level puck of coffee. This forces the water to flow through it evenly instead of finding little weak spots, a problem we call "channelling." Channelling is a fast track to a sour, under-extracted shot.
After distributing, tamp the grounds down with firm, even pressure. Make sure you keep the tamper perfectly level, because a crooked tamp will lead to uneven extraction every time. Now, you're ready for the main event.
Reading The Extraction
Lock the portafilter into your machine, place your scales underneath with your cup, and hit the brew button. Keep an eye on the clock and the scales. A well-pulled double espresso should take about 25 to 30 seconds to extract and yield roughly double the weight of your dry coffee (for example, an 18g dose should give you a 36g shot).
- Shot runs too fast (under 25 seconds)? It’s going to taste sour. This means your grind is too coarse, so adjust your grinder to a finer setting.
- Shot runs too slow (over 30 seconds)? You'll probably get a bitter, harsh flavour. Your grind is too fine, so adjust it to be a bit coarser.
Getting the hang of this takes a bit of practice, but it's incredibly rewarding when you nail it. Of course, none of this matters if you're not starting with great beans. If you're looking for the perfect match for your machine, you can check out our recommendations for the best coffee beans for espresso.
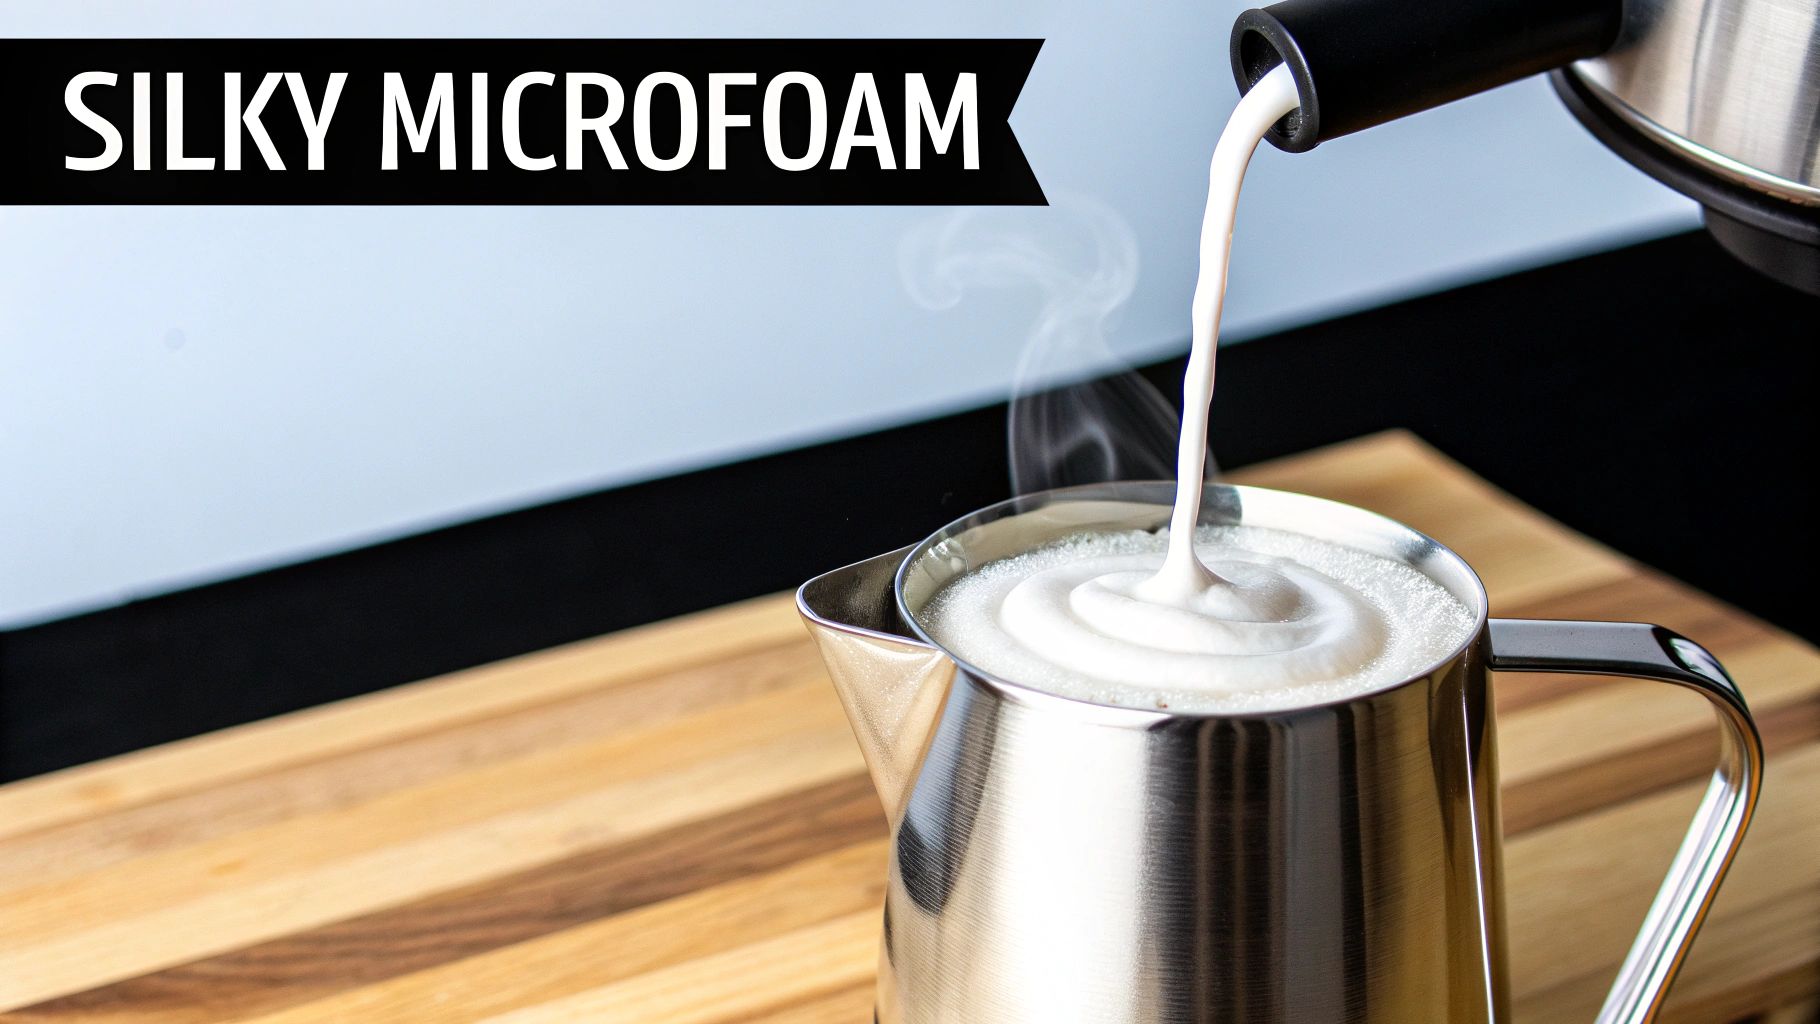
The Art of Steaming and Texturing Milk
That perfect espresso shot is only half the story for most of the cafe favourites we love. Silky, velvety milk is what truly takes a coffee from just ‘good’ to absolutely exceptional.
The secret is all in creating microfoam—that glossy, smooth texture you get when milk and air are perfectly integrated. We’re aiming for a consistency that’s almost like wet paint, which is essential for both flavour and pouring beautiful latte art. Forget those big, soapy bubbles you might get from a cheap frother; this is the real deal.
The whole process boils down to two distinct phases: stretching and texturing. Think of it as first adding the volume, then refining it into something beautiful. For a deeper dive, our complete guide on how to froth milk at home has even more tips to get you started.
Stretching The Milk
Stretching is really just the fancy term for the aeration phase, where you’re introducing air into the milk. Always start with cold milk in a cold jug, filling it to just below where the spout begins. Give your steam wand a quick purge to clear out any trapped water, then dip the tip just below the milk's surface, positioning it slightly off-centre.
Now, turn the steam on. You should hear a gentle "tsh-tsh-tsh" sound, a bit like paper tearing. That’s the sound you want—it means air is being drawn into the milk. Keep the wand tip right near the surface until the jug starts to feel lukewarm in your hand. You’re looking for the milk to expand by about 20-30%.
Texturing and Heating
Once you’ve added enough air, it’s time to create the vortex. Plunge the steam wand deeper into the milk, but keep it in that same off-centre position. This will create a powerful whirlpool effect, spinning the milk and folding all those tiny air bubbles into a seamless, silky microfoam.
Keep heating the milk until the jug feels almost too hot to comfortably hold—that sweet spot is usually around 60-65°C. If you go any hotter, you'll scald the milk and ruin its natural sweetness.
As soon as you hit temperature, turn off the steam, wipe the wand down immediately, and give it one last purge. A quick swirl of the jug will keep the microfoam glossy, and a firm tap on the counter will pop any larger bubbles that might have formed.
A Quick Tip for Plant-Based Milks: Oat milk textures beautifully and is a fantastic dairy alternative for home barista coffee. Almond milk can be a bit trickier as it tends to separate more easily, so the key is to work quickly and avoid overheating it to get the best results.
Building Your Cafe Drink Menu at Home
Once you’ve got a handle on pulling a great espresso shot and steaming that perfect, silky milk, you’re ready for the fun part: making your favourite cafe drinks. Think of this as your personal recipe book, a way to recreate the classics that make Australia’s coffee scene so incredible.
The real difference between most popular coffees boils down to a simple ratio of espresso to milk, and just how much foam you add. Getting this right is the secret to making a coffee that tastes exactly like it does from your local. Plus, mastering these drinks at home is a pretty smart move for your wallet.
These days, a single flat white in a major city can easily set you back $6.00 to $7.00, a huge jump from just a few years ago. It just goes to show how much we value a well-made coffee, a cornerstone of an industry that pumps a massive $45.3 billion into the economy. You can read more about Australia's thriving cafe sector to see just how big it is.
Your Starting Drink Recipes
Let's break down the essential milk-based coffees you'll find on any Aussie cafe menu. All of these recipes start with a standard double shot of espresso, which is about 36-40g.
-
Flat White: A true Aussie icon. It’s all about a thin, velvety layer of microfoam (around 5mm) poured over a double shot. This creates a strong, smooth coffee where the espresso flavour really gets to shine.
-
Latte: Very similar to a flat white, but it's a bit more generous with the foam—usually around 1cm. This gives it a milder, creamier taste and you’ll often see it served in a glass.
-
Cappuccino: This is the frothiest of the lot, with at least 2cm of thick, airy foam. It’s always finished with that signature dusting of chocolate powder on top.
Getting these drinks right is all about feel and practice. Don't stress if your first few attempts aren't perfect. The real magic happens when you start paying attention to how the milk and espresso combine in the cup.
And for those days when you're after something a bit different, you can always branch out into an intense piccolo or a refreshing iced coffee. If you want to explore a completely different brewing method, you might also enjoy learning about the benefits of cold brew coffee.
Getting to Grips with Common Coffee Problems
Look, even the most seasoned baristas pull a bad shot now and then, so don’t get down on yourself when your espresso goes a little sideways. Learning to make incredible coffee at home is all about trial and error. Think of these off-pucks as learning opportunities—it’s honestly the quickest way to get better.
Most of the time, if your espresso tastes a bit off, it can be traced back to just a couple of key things. Start by asking yourself two simple questions:
- Does my coffee taste sour? This is almost always a dead giveaway for under-extraction. It means the water shot through the coffee puck way too fast.
- Is my coffee bitter? This usually points straight to over-extraction. The water hung around with the coffee grounds for too long.
How to Fix Sour and Bitter Shots
If you've got a sour shot that ran too quickly (think under 25 seconds), your first and best move is to adjust your grinder to a finer setting. This makes the coffee grounds more compact, creating more resistance for the water and slowing everything down.
On the flip side, for a bitter shot that trickled out too slowly (anything over 30 seconds), you'll want to make your grind coarser. This gives the water an easier path, speeding up the extraction. Just remember to only change one thing at a time, and always start with the grind setting.
A bad-tasting shot isn’t a failure; it’s just your coffee giving you direct feedback on what to adjust for the next attempt. Listen to it and tweak accordingly.
Now, what about the milk? If it’s not texturing properly and you're getting big, soapy bubbles instead of that silky microfoam, it's nearly always a steam wand issue. Make sure the tip is just below the surface when you start stretching the milk, then dip it a bit deeper to get that vortex spinning. The angle and depth are everything when you’re chasing that perfect, paint-like consistency.
A Few Common Questions
Diving into the world of home barista coffee is exciting, but it often brings up a few questions. Let's tackle some of the most common ones to help you get on the right track.
What's the Most Important Thing for Great Coffee?
It really boils down to three key things: using fresh, high-quality coffee beans, getting a consistent grind from a good burr grinder, and having the right water temperature and pressure from your machine.
For anyone just starting out, the biggest game-changer is almost always the grind. Nailing your grind size directly controls how long the espresso takes to extract and, ultimately, what it tastes like in the cup.
Why Does My Espresso Taste So Bad?
If your espresso tastes off, it's almost certainly an extraction problem. Think of it this way:
- A sour flavour usually means it was under-extracted—the shot ran through the coffee grounds too quickly. The fix is simple: make your grind setting finer.
- A bitter flavour points to over-extraction, meaning the water ran through the coffee for too long. To solve this, you just need to make your grind a little coarser.
A great tip is to keep your coffee dose (how much you put in the basket) and your tamping pressure the same every time. That way, the grind is the only thing you need to adjust to get that perfect shot.
Can I Make Good Coffee Without a Super-Fancy Machine?
Absolutely. While a proper espresso machine is the only way to get true, crema-topped espresso, you can make fantastic coffee with more budget-friendly gear.
Things like a Moka pot or an AeroPress can produce a wonderfully strong, concentrated coffee that works as a brilliant base for lattes and flat whites. The golden rule is the same no matter what you're using: always, always start with freshly ground, quality beans.
At Absolute Cravings, we believe that amazing coffee is a core part of a healthy, vibrant lifestyle. If you're ever in Townsville, we’d love for you to drop by our cafe and taste the passion we put into every single cup. Come find your new favourite brew with us at https://www.absolutecravings.com.au.


