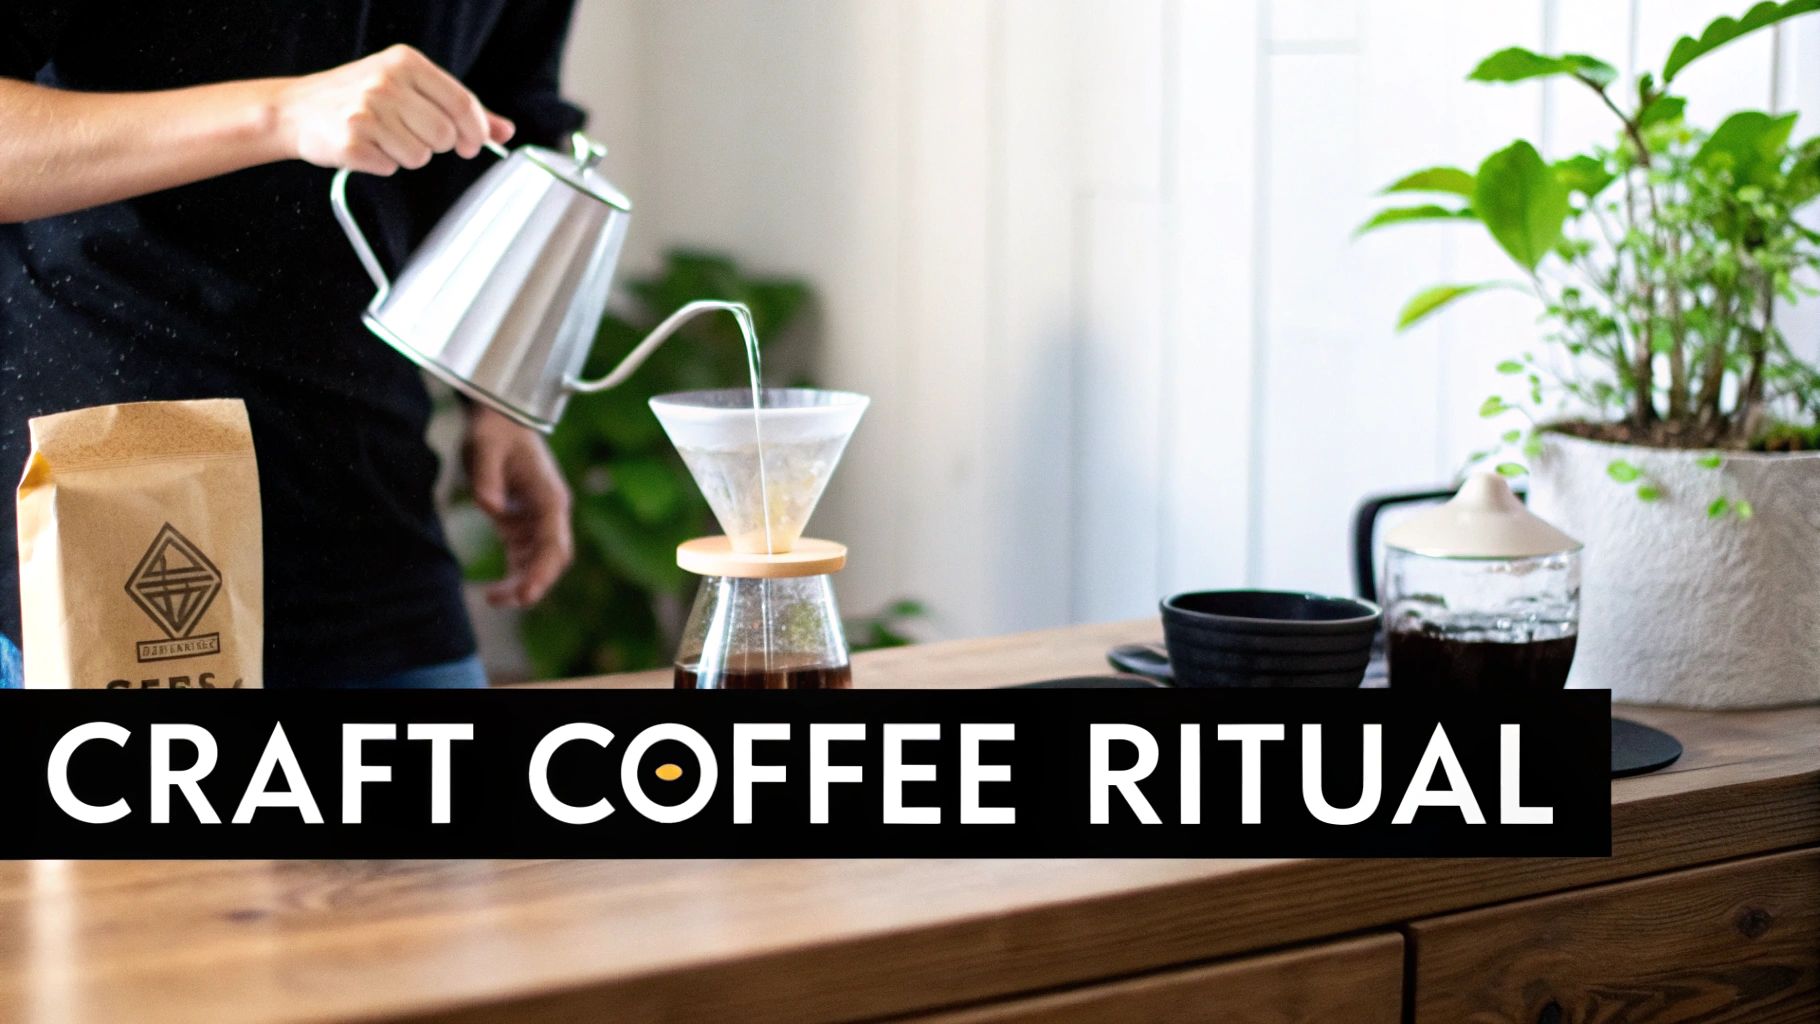
Brewing pour-over coffee is a hands-on method where you manually pour hot water over coffee grounds in a filter. The magic really lies in getting a handle on the key variables—things like your water temperature, how fast you pour, and the coarseness of your grind. Nailing these lets you pull out all the nuanced flavours from the bean, resulting in a clean, bright cup that truly shows off the coffee's unique character.
Why Australians Are Embracing Pour Over Coffee
It’s no secret that we Aussies are pretty serious about our coffee. For years, the flat white and the long black have been the undisputed kings of our cafe culture, but something quieter and more deliberate has been brewing in kitchens across the country.
More and more, people are swapping the quick cafe run for the mindful ritual of making pour-over coffee at home. It’s a real shift in how we connect with our daily brew, and this hands-on method has captured the hearts of coffee lovers for one simple reason: it offers complete control.
This trend is tied to our growing love for artisanal products and single-origin beans. We're becoming more discerning, wanting to taste the distinct flavour profiles from specific coffee regions—from the bright, fruity notes of an Ethiopian Yirgacheffe to the rich, chocolatey depth of a Colombian. Pour-over is the perfect way to go on that journey.
Unlike an automatic machine, this method lets you influence every single part of the brewing process:
- Water Temperature: You can fine-tune the heat to extract specific flavour compounds.
- Grind Size: Adjusting the grind allows you to manage extraction time and taste perfectly.
- Pouring Technique: A steady, controlled pour ensures all the grounds are evenly saturated.
A Mindful Morning Ritual
Beyond the technical side of things, making a pour-over offers something a bit more profound: a moment of craft in an otherwise busy day. The process is methodical and engaging, turning a simple habit into a genuinely rewarding experience.
It forces you to slow down, focus on the details, and appreciate the transformation from bean to cup. This hands-on, almost meditative approach is a huge part of its growing popularity.
Recent findings are backing this up, too. A 2025 coffee trend study highlighted that specialty methods like pour-over are gaining serious traction as Australians shift from convenience-first habits to more conscious, flavour-driven choices.
By mastering the pour-over, you’re not just making coffee; you’re unlocking the full potential of the beans. It’s a skill that rewards patience with a truly exceptional cup.
Learning how to brew pour-over coffee is much more accessible than you might think. It’s all about understanding a few key principles and then developing your own feel for the process.
This guide will show you how to celebrate fantastic local roasters, like our friends at Long Shot Coffee, by bringing out the absolute best in their beans right in your own kitchen.
Getting Your Home Brewing Station Ready
Before you can dive into the perfect pour, you need to have the right tools on hand. Think of it like a chef preparing their ingredients—having the right equipment doesn't just make things easier; it fundamentally changes the quality of what you create. Setting up your station is the first real step toward that consistently delicious cup of coffee you're chasing.
You don’t need a benchtop cluttered with complicated gadgets, but a few key pieces are essential if you want that clean, vibrant flavour that pour over is famous for. This isn't about becoming a coffee snob; it's about giving yourself the control needed to unlock the amazing taste hidden inside your beans.
It's clear more Aussies are embracing the home-brewing ritual. Spurred on by a mix of remote work and ever-climbing cafe prices, our daily coffee habits are shifting. In fact, fresh data suggests that by 2025, a massive 70% of Australian coffee drinkers will be brewing at home. This trend is backed by a huge amount of online resources, making it simpler than ever to get started. You can read more about how our coffee consumption habits are changing on intelligence.coffee.
Your Essential Pour Over Equipment Checklist
Let's walk through the gear you'll need. While it’s possible to find budget-friendly options for everything, investing in quality from the get-go will pay off in both flavour and the lifespan of your equipment. This table breaks down what you need and why it's so important.
| Equipment | Why It Matters | Beginner's Tip |
|---|---|---|
| A Quality Burr Grinder | This is the most crucial piece of kit. Burr grinders create uniform particles for an even extraction, while blade grinders just chop inconsistently, giving you a messy mix of sour and bitter flavours. | A manual hand grinder is a fantastic, affordable starting point. It delivers great consistency without the high price tag of an electric model. |
| A Digital Scale | Precision is the name of the game. A scale measuring in 0.1-gram increments lets you weigh your coffee and water perfectly, so you can repeat that "perfect cup" again and again. Guesswork just leads to frustration. | Look for a scale with a built-in timer. It's a small feature that makes a huge difference when you're tracking your bloom and pour times. |
| A Gooseneck Kettle | That elegant, long spout isn't just for show. It provides total control over your water's flow rate and direction, ensuring you can saturate the coffee grounds gently and evenly. A regular kettle is like using a fire hose on a delicate plant. | You don't need a fancy electric one to start. A simple stovetop gooseneck kettle works just as well and gives you the same level of control. |
| Your Dripper & Filters | This is the heart of your setup. The dripper's shape and material influence the flow rate and heat retention, which directly impacts the final taste in your cup. | For filters, always rinse them with hot water before adding coffee. This removes any papery taste and preheats your dripper and server. |
| Freshly Roasted Beans | You can have the best gear in the world, but it won't matter if your beans are stale. Fresh beans are bursting with complex flavours and aromas that degrade quickly after roasting. | Buy beans from a local roaster (like us at Absolute Cravings!) and look for a "roasted on" date. Aim to use them within a few weeks of that date for the best flavour. |
Ultimately, starting with the right tools sets you up for success. It takes the guesswork out of the process and lets you focus on the fun part: brewing and tasting.
Choosing Your Dripper
The dripper is where the magic happens, and different designs will subtly tweak the flavour profile of your brew. Two of the most popular choices out there offer pretty distinct experiences.
The Hario V60 is a classic. It’s cone-shaped with a big hole at the bottom and spiral ribs on the inside, which gives you maximum control over the brew. It’s quite sensitive to your pouring technique, making it a brilliant tool for those who love to experiment to achieve a bright, clean cup.
On the other hand, you have the Kalita Wave. This one has a flat-bottomed base with three small holes. This design promotes a more even and consistent extraction, making it incredibly forgiving. It's an excellent choice for beginners or anyone who values a reliable, balanced brew every time.
While these drippers are designed for pour over, the principles of using freshly ground, quality beans apply across all brewing methods. Understanding your beans is just as important for other techniques, and you can explore our guide to the best coffee beans for espresso to learn more on that front.
Pro Tip: Don't forget the paper filters! Make sure you buy the right size and shape for your specific dripper. Rinsing the filter with hot water before you add your coffee grounds is a non-negotiable step—it gets rid of any papery aftertaste and nicely preheats your whole setup.
A Practical Guide to the Brewing Process
With your station all set up, it's time to get into the heart of it—actually brewing your pour-over coffee. This is where the real craft begins. It's best to think of this not as a strict set of rules, but more like a conversation between you and your coffee, where you guide the process to pull out something truly special.
We’re going to walk through the whole sequence, from prepping the filter right through to that final, satisfying pour. The goal isn't just to blindly follow steps, but to really understand why each part matters. Once you start picking up on the visual cues and aromas, you’ll develop an intuition that goes way beyond any single recipe.
Setting The Stage For Success
Before a single drop of water hits your coffee grounds, there are a couple of non-negotiable prep steps for a clean, consistent brew. First up, pop your paper filter into the dripper and give it a good rinse with hot water. This simple move does two crucial things: it washes away any of that papery taste from the filter and, just as importantly, it preheats your dripper and server. This avoids any sudden temperature drops that can mess with your extraction.
After rinsing, make sure to tip that water out of your server. Now, it's time for the beans. For the best possible flavour, always grind your coffee right before you brew. This keeps all those incredible, volatile aromatic compounds locked in until the last second.
This flow is pretty simple but essential: grind, weigh, and get ready to pour.

Getting your grind and weight spot-on from the beginning really is the foundation for everything that follows.
Finding Your Starting Ratio And Temperature
Consistency is king in coffee brewing, and it all starts with reliable numbers. You can always tweak things later, but these figures give you a solid baseline for a balanced cup.
- Coffee-to-Water Ratio: A great place to begin, and a bit of an industry standard, is a 1:16 ratio. This simply means for every 1 gram of coffee, you’ll use 16 grams (or mL) of water. For a 300ml cup, you'd start with around 19 grams of coffee.
- Water Temperature: The sweet spot for extraction is between 90-96°C. If you don't have a fancy temperature-controlled kettle, no worries. Just bring your water to a boil and let it sit for about 30-45 seconds before you start pouring.
These are just starting points. If your brew tastes a bit weak, try tightening the ratio to 1:15. If it’s too strong, maybe widen it to 1:17. The trick is to only change one thing at a time so you can really taste the difference it makes.
The Critical First Pour: The Bloom
Alright, you've got your ground coffee in the rinsed filter, and your scale is set to zero. It’s time for the most visually satisfying part: the bloom. This is your initial pour where you add just enough water to let the coffee grounds "de-gas."
Freshly roasted coffee has CO2 trapped inside from the roasting process. The bloom lets this gas escape so it doesn't get in the way of the water properly saturating the grounds.
To nail the bloom, start your timer and slowly pour about double the weight of your coffee in water—so for 19 grams of coffee, use around 38-40 grams of water. Make sure all the grounds are wet. You'll see the coffee bed swell up and bubble. Just let it sit and do its thing for about 30-45 seconds. A healthy bloom is a fantastic sign of fresh beans.
Executing The Main Pouring Stages
After the bloom has settled, you'll start the main pour. Your goal here is to keep a steady, gentle stream of water to encourage an even extraction. Don't just dump all the water in at once!
Instead, pour in slow, concentric circles. Start in the centre and spiral your way out, then back in again, avoiding pouring directly down the sides onto the filter paper. This technique, sometimes called pulse pouring, means you add water in stages. For a 300g brew, you might add water in 60-80 gram pulses, letting the water level drop a little before adding the next one.
This methodical pouring makes sure all the coffee grounds are working equally, preventing "channelling" (where water finds a shortcut and bypasses some of the coffee). You should aim to have all your water poured by the 2:30 to 3:00 minute mark, with the brew finishing its final drips between 3:00 and 4:00 minutes total.
Reading The Coffee Bed
Once the last drop has fallen, take a peek at the bed of coffee grounds left in your filter. A well-extracted pour-over will leave a flat, even bed. This is your sign that water passed through everything uniformly.
If you see a big crater or lots of grounds stuck high up on the sides, it might mean your pouring was a bit uneven. This visual feedback is gold for tweaking your technique next time. Nailing your grind size is a whole other journey, and our comprehensive coffee grind size chart is a fantastic resource to help you get it right.
Pour-over is just one brilliant way to make coffee. If you're keen to expand your skills, you might want to explore these 10 best coffee brewing methods and discover a new favourite.
Finally, give the coffee in your server a gentle swirl to mix all the flavours together. Then, pour it into your favourite mug, take a moment to breathe in that amazing aroma, and enjoy the clean, complex cup you just made with your own two hands.
Mastering Your Pouring Technique
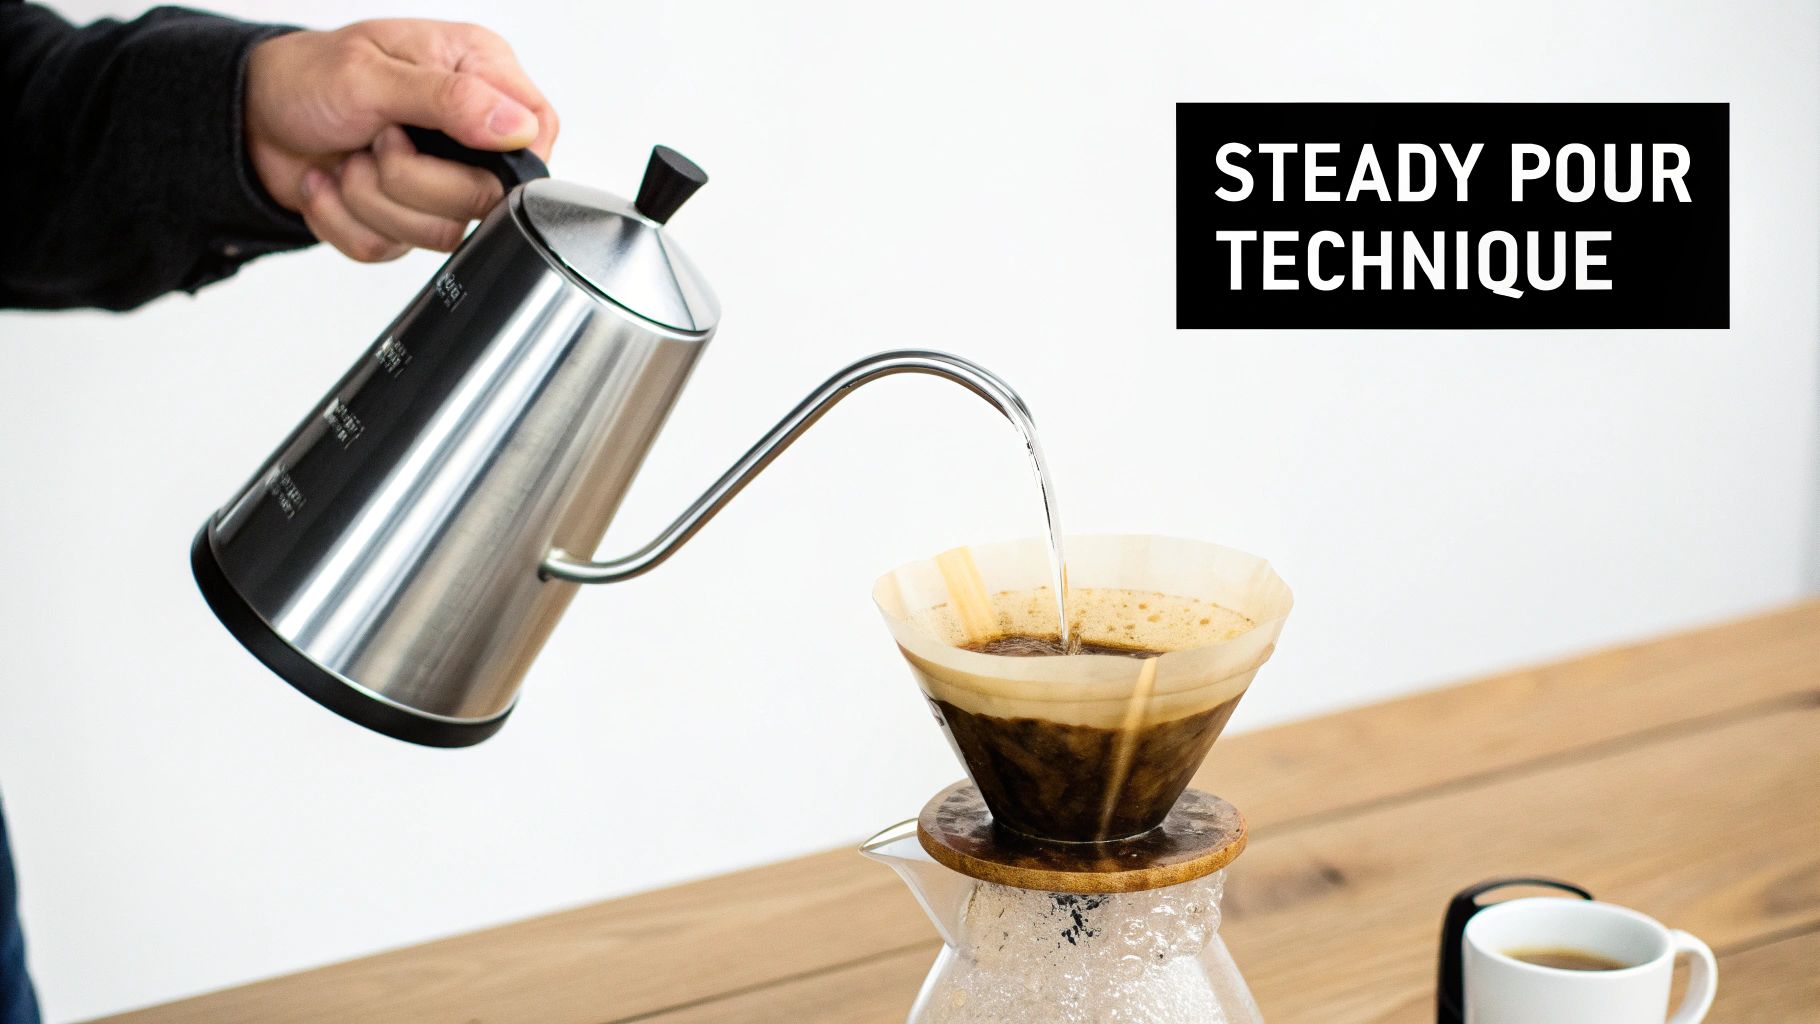
If the beans are the soul of your coffee, then your pouring technique is its heartbeat. It’s the single biggest factor you can control in real-time that will shape the final taste in your cup. Mastering how you introduce water to the grounds is the difference between simply making coffee and truly crafting its flavour profile.
This is exactly why a gooseneck kettle is such a game-changer for pour-over. That long, elegant spout gives you incredible control over the speed, direction, and placement of your pour. Think of it like watering a delicate plant with a precise watering can instead of just dumping a bucket on it—one nurtures, the other overwhelms.
The goal is always to saturate the coffee grounds evenly without stirring them up too much. A slow, steady hand is your best friend. By managing the water flow, you’re really controlling the extraction rate, making sure you pull out all those desirable sweet notes without straying into bitterness. For ultimate precision, it helps to master the art of using a Fellow Kettle so you can nail that flow rate every time.
The Concentric Circle Pour
This is the classic, go-to technique for a reason—it’s reliable, effective, and promotes an incredibly even extraction. The idea is simple: you pour water in a continuous, gentle spiral.
Start your pour right in the centre of the coffee bed and slowly work your way outwards in a spiral towards the edge of the dripper, then spiral back towards the centre. The trick is to keep a consistent flow rate and a steady hand throughout.
- Pacing is Everything: Keep the stream of water thin and consistent. If you rush it, you can create channels where water finds a shortcut through the grounds, leading to a weak, under-extracted brew.
- Avoid the Edges: Try not to pour directly onto the paper filter. Water can easily run down the sides of the dripper, skipping the coffee entirely and just diluting your final drink.
- Maintain a Low Pour Height: Keep the spout of your kettle just a few centimetres above the coffee bed. Pouring from too high up agitates the grounds aggressively, which can lead to an uneven and bitter extraction.
This method ensures every part of the coffee bed gets an equal amount of love from the water, which is the real secret to a balanced, complex cup.
Your pouring rhythm directly impacts how the coffee tastes. A slow, methodical pour extracts sweetness and complexity, while a fast, aggressive pour often leads to a hollow or bitter cup.
Exploring Pulse Pouring
Once you’re comfortable with the basic spiral pour, you can start experimenting with pulse pouring. Instead of one long, continuous pour after the bloom, you break it up into several smaller, timed pours. This gives you another layer of control over the whole process.
For a typical 300g brew, a pulse routine might look something like this:
- The Bloom: Start with a 40g pour and let it sit for 30-45 seconds.
- First Pulse: Gently add another 100g of water in your spiral pattern, bringing the total weight to 140g.
- Second Pulse: Once the water level has dropped a bit, add another 80g, bringing the total to 220g.
- Final Pulse: Finish with a final 80g pour to reach your target brew weight of 300g.
So, what’s the point? Each pulse gently re-saturates the coffee bed, which helps maintain a more stable water temperature and encourages a deeper, more thorough extraction. It’s a fantastic way to bring out the subtle, nuanced notes in lighter roast, single-origin coffees.
The Art of Agitation
Agitation just means stirring or mixing the coffee grounds while you brew. While too much is a bad thing, a little bit of deliberate agitation can be a seriously useful tool.
- During the Bloom: Some brewers like to gently stir the grounds with a small spoon or swirl the dripper right after that first bloom pour. This just makes sure all the coffee is evenly wet and releasing its gas properly.
- The Rao Spin: Made popular by coffee expert Scott Rao, this technique involves giving the dripper a gentle swirl right after your final pour. This little motion helps flatten the coffee bed, knocking down any grounds stuck to the sides and ensuring the water drains through evenly.
These small movements can have a big impact, helping to prevent channelling and making sure every single coffee particle contributes to that final beautiful flavour. Ultimately, the best pouring technique is the one that feels natural to you and gets you a cup of coffee you absolutely love. Don't be afraid to play around, pay attention to the results, and let your taste buds be your guide.
Working Through Your Pour Over Problems

Let’s be honest, even with the best gear and the freshest beans from Absolute Cravings, not every brew is going to be a winner. That’s perfectly okay—in fact, it’s a crucial part of mastering the art of pour over coffee. Think of every cup as feedback, giving you little clues on what to tweak for the next one.
When your coffee tastes a bit off, it almost always comes down to one thing: extraction. The water has either pulled too much from the grounds (over-extraction) or not nearly enough (under-extraction). Learning to spot the difference is your first real step toward getting that perfect cup, every single time.
What to Do About a Bitter Brew
Does your coffee have a harsh, drying, or unpleasantly bitter taste? That’s the classic sign of over-extraction. It’s what happens when water hangs around the coffee for too long, stripping out all sorts of compounds you'd rather leave behind.
This is usually caused by one of these culprits:
- Your grind is too fine: Super-fine grounds have a massive surface area, so the water extracts everything way too fast and then gets stuck, dragging out the brew time.
- Your water is too hot: Water boiling well above 96°C can literally scorch the grounds, creating bitter flavours.
- Your brew time is too long: If your pour over is taking more than four minutes to drain completely, you’re almost certainly over-extracting.
The easiest fix? Go for a coarser grind. Just dial your grinder back one or two clicks and taste the result. It’s amazing how this one small change can take your brew from harsh to wonderfully smooth.
Fixing a Sour or Weak Cup
On the flip side, you might get a cup that tastes sour, thin, or just disappointingly weak. This is a dead giveaway for under-extraction, meaning the water didn't have enough time or energy to pull out all the sweet, delicious compounds we’re after.
You're probably dealing with one of these issues:
- Your grind is too coarse: Water is just rushing right through the grounds without grabbing much flavour on its way.
- Your water is too cold: Water below 90°C just doesn't have the oomph to dissolve the good stuff properly.
- You have an uneven pour: If you pour too quickly or create channels in the coffee bed, the water will take the path of least resistance and bypass most of the grounds.
The main solution here is to make your grind finer. This simple adjustment increases the surface area and slows the water down, allowing it to do its job and extract all that beautiful flavour.
A key piece of advice: only ever change one thing at a time. If you adjust the grind, keep the water temperature and your pouring technique exactly the same. It's the only way to know for sure what made the difference.
The Slow Drain Dilemma
There’s nothing more frustrating than a brew that just… won’t… drain. A slow drawdown is a common headache and almost always leads to an over-extracted, bitter cup. Nine times out of ten, the culprit is a grind that’s too fine, creating a dense bed of coffee that’s clogging up your filter.
This also touches on the importance of an efficient process. Interestingly, a survey found that 65% of people are happy to wait five to ten minutes for a cafe pour-over, but their patience drops off a cliff after that. Part of the craft is achieving a great result within a reasonable time, even at home. You can read more about it in these insights on pour-over wait times on perfectdailygrind.com.
By listening to what your taste buds are telling you, you can turn a disappointing brew into a valuable lesson. Before you know it, you'll be one step closer to your perfect pour over.
It All Starts with the Beans
You've now got the techniques down pat, you know what to look for when things go wrong, and you have a solid grasp of the craft behind a truly exceptional cup of coffee. But mastering the pour-over is a journey, and while your skill is crucial, the single most important ingredient is always going to be the beans themselves.
Great technique can only take you so far. It’s the phenomenal beans that make a brew unforgettable.
This is where your coffee adventure really kicks off. Here at Absolute Cravings, we see ourselves as your partner in this chase for the perfect flavour. We carefully source and roast beans that are just right for the pour-over method, where all their unique, delicate characteristics can really shine.
Find Your Perfect Flavour
Maybe you're drawn to the bright, almost-juicy notes of a single-origin from Ethiopia. Or perhaps you prefer the rich, chocolatey comfort of a perfectly balanced blend. Whatever your preference, we have something to match your palate and help you explore the incredible diversity of the coffee world.
The real joy of pour over is tasting how a specific origin, roast, and your own two hands can create a cup that’s completely unique. It’s a direct connection to the coffee’s story.
We invite you to put your new skills to the test with beans that truly deserve the care and attention of a manual brew. Don't just think of us as a supplier; we're a local resource right here in Townsville, passionate about helping you discover your next favourite coffee.
Check out our range of freshly roasted beans at Absolute Cravings and taste the difference quality makes. It’s time to turn your newfound knowledge into a delicious daily ritual, taking your home coffee from simply good to absolutely fantastic. Your perfect cup is waiting.
Your Pour-Over Questions, Answered
Even with the best guide in hand, a few questions always seem to bubble up when you're getting the hang of pour-over. I've been there. Here are some quick answers to the most common queries I hear, designed to help you solve those little brewing puzzles.
What’s the Best Coffee to Water Ratio to Start With?
A brilliant place to begin is the classic 1:16 ratio. In simple terms, that’s 1 gram of coffee for every 16 grams (or millilitres) of water. So, if you're making a 300ml cup, you'll want to use around 18-19 grams of coffee.
This ratio is a fan favourite for a reason—it almost always delivers a beautifully balanced, flavourful extraction. But don't treat it as a hard-and-fast rule! Think of it as your baseline. If you find yourself wanting a stronger, punchier brew, try tightening things up to 1:15. For something a bit lighter and more delicate, you can open it up to 1:17.
Why Is My Coffee Draining So Slowly?
If your brew is taking its sweet time and dragging on past the four-minute mark, the number one culprit is usually your grind size. It's almost certainly too fine. When the coffee particles are too small, they pack down tightly and choke the water flow.
This super-slow drain is what leads to over-extraction, and that’s where those nasty bitter and astringent flavours come from.
The fix is simple: just dial your grinder back to a slightly coarser setting. You're aiming for something that looks and feels like coarse sand. It's also worth checking your pouring technique—if you're pouring too aggressively, you can stir up the coffee bed and cause the finer particles to clog the filter paper. A gentle hand is key.
Can I Make a Good Pour-Over Without a Gooseneck Kettle?
Yes, absolutely! While a gooseneck kettle gives you incredible precision and is what most of us end up using, it's definitely not a deal-breaker when you're starting out. You can still make a fantastic cup with a regular kettle.
The trick is to focus on pouring as slowly, gently, and consistently as you can. Try to hold the spout of your standard kettle as close to the dripper as possible to avoid agitating the coffee grounds too much. It might be a little more challenging to get a perfectly even extraction, but it's a great way to nail down the fundamentals before you decide to upgrade your gear.
Ready to put your newfound skills to the test with some truly exceptional beans? Absolute Cravings has a curated selection of freshly roasted coffee that is perfect for your pour-over adventures. Explore our range and taste the difference that quality makes.


